Common Reasons Buildings Fail an Air Tightness Test
Published: 11.05.2026
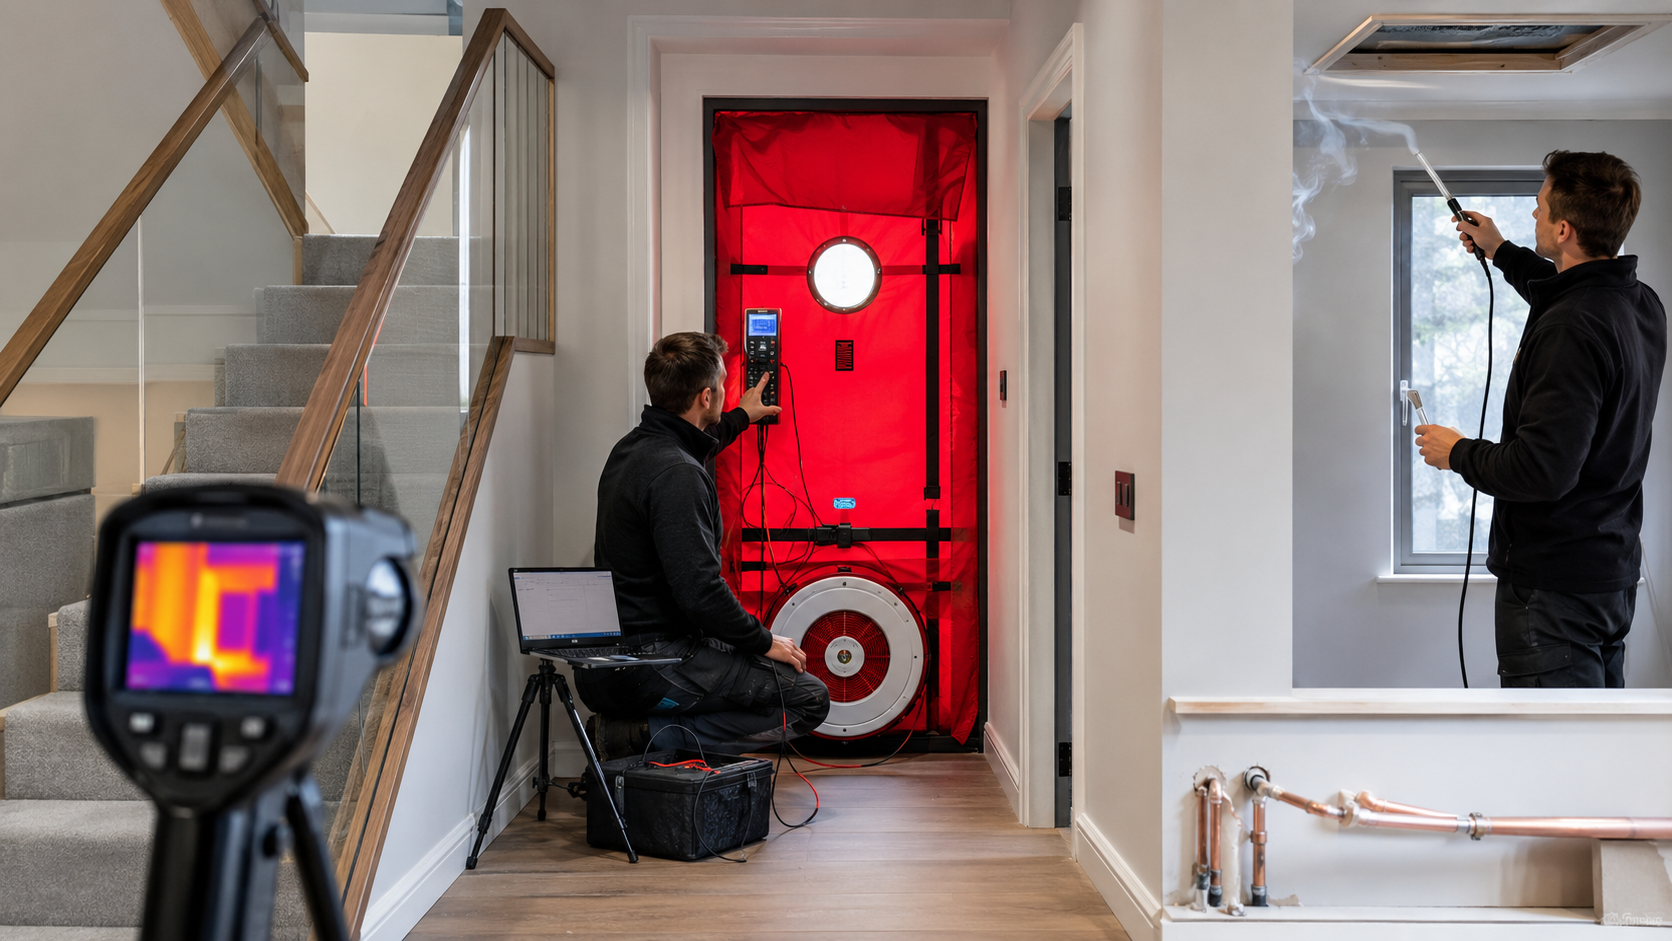
Air tightness testing is an important part of proving that a building performs as designed. Whether it is a newly built home, a commercial property, a Passivhaus project or a complex refurbishment, the test shows how much uncontrolled air is passing through the fabric of the building.
At Thermal Image UK, we carry out air tightness testing services throughout Scotland, the North of England and further afield.
We work on everything from individual houses to large and complex buildings. Our team used the latest calibrated Retrotec blower door equipment to pressurise and depressurise buildings at 50 Pascals.
Where required, we also combine air tightness testing with thermal imaging and smoke testing. This means you will know where the problem areas are if it fails.
A failed air tightness test can be frustrating, especially when a project is close to being completed. The good news is that many failures come down to common issues that can be identified and corrected.
Below, we explain some of the most frequent reasons buildings fail an air tightness test and how to avoid them.
Poor Sealing Around Service Penetrations
One of the most common causes of air leakage is poor sealing around service penetrations. These are the points where pipes, cables, ducts and other services pass through walls, floors, ceilings or the building envelope.
Even small gaps can make a difference. A pipe passing through plasterboard, an unsealed cable route or a gap behind a kitchen unit can all allow air to move through the fabric of a building. Individually, these leaks may seem minor, but across an entire property they can add up quickly.
We often see this issue around:
- Pipework
- Boiler flues
- Extract ducts
- Electrical cables
- Soil pipes
- MVHR ducting
- Utility and plant room services
To avoid problems, service penetrations should be sealed to the design specification. This should be done before the final air test. It is much easier to deal with these details while the work is still visible and accessible.
Gaps Around Windows and Doors
Windows and external doors are another frequent source of air leakage. Even when the products themselves are good quality, the installation detail matters. Gaps around frames, missing sealant, poor draught stripping or incomplete mastic work can all lead to a failed test.
For a final air tightness test, all windows and external doors should be fully installed, adjusted and fitted with draught strips where required. Any mastic around frames should be complete and finished to the correct specification.
We regularly advise clients to check these areas carefully before the test. Air leakage around a door threshold or window reveal can be easy to miss during construction, but it can have a noticeable effect on the final result.
Loft Hatches and Access Panels Not Properly Sealed
Loft hatches, service hatches and access panels are often overlooked. If they are not installed, fitted tightly or draught sealed, they can become significant leakage points.
A loft hatch should be in place before the test and should include the correct draught strip to match the design specification. Access panels to pipe chases, service voids or plant areas should also be fitted and sealed correctly.
This is especially important because leakage into loft spaces or service voids can be difficult to see during a normal visual inspection. If the building fails, we can use smoke testing and thermal imaging to help track where the air is moving.
Incomplete Plasterboard, Skirtings or Internal Finishes
Air tightness depends on the building envelope being complete. If plasterboard, skirtings or internal sealing works are unfinished, air can pass through gaps that would normally be closed at completion.
For the final air test, plasterboard should be in place and sealed or taped as required. Skirtings should be fitted, and mastic work around windows, skirtings and junctions should be completed to the design specification.
Sometimes, clients ask whether a building can be tested before everything is finished. In some cases, we can accommodate this. However, it must be discussed in advance. An incomplete building may not give a result that reflects the final condition of the property.
Kitchens and Bathrooms Not Fully Sealed
Kitchens and bathrooms can contain many hidden air leakage paths. Pipework, waste outlets, service voids, extractor fans and fitted units can all create opportunities for air to escape if not sealed properly.
Because many of these areas become hidden once units and sanitaryware are installed, it is important that sealing is considered before final finishes go in. Gaps behind kitchen units, bath panels, shower trays and WC boxing can be difficult to access later.
At Thermal Image UK, we often help site teams identify these problem areas when a test result is not where it needs to be. If the issues can be resolved quickly, we can often re-test the building during the same visit.
Downlights, Sockets and Electrical Fittings
Electrical fittings are another common cause of leakage. Sockets should be in place and screwed to the wall before the test. Downlights should be pushed into their final position, as they are sometimes pulled out during decorating.
Recessed lighting can be a particular issue if it interrupts the air barrier or is not properly sealed. Air can pass through ceiling voids and escape through small openings around fittings.
Before the test, it is worth walking through the property and checking that all sockets, switches, lighting and electrical fixtures are fully installed and in their final position.
Ventilation Systems Not Prepared Correctly
Air tightness should not be confused with ventilation. A building still needs controlled ventilation for comfort, safety and indoor air quality. Air leakage is different because it is uncontrolled movement of air through gaps and cracks in the building fabric.
During an air tightness test, ventilation systems need to be prepared correctly. Trickle vents should usually be closed, but not sealed. If the property has an MVHR system, it should be switched off and sealed as required, often externally.
Incorrect ventilation preparation can affect the test result. If you are not sure how your ventilation system should be treated, we can talk you through this before the test.
The Building Is Not Ready for Final Testing
A final air tightness test should normally take place when the building is complete and ready for occupation. If the property is still missing key elements, the result may not be reliable or may lead to a fail.
Before booking a final test, check that:
- External doors and windows are fitted
- Plasterboard and internal finishes are complete
- Kitchens and bathrooms are installed
- Pipe penetrations are sealed
- Loft hatches and access panels are fitted
- Sockets, switches and lights are in place
- Flues are installed and sealed
- Ventilation systems are ready for testing
We understand that construction programmes can be tight and that not every project runs exactly to plan. If something is incomplete, it is best to tell us in advance so we can advise whether testing is still practical.
The Building Is Too Air Tight
This may sound surprising, but it’s one of the most common reasons a new dwelling fails an air tightness test: it’s too air tight for the ventilation strategy specified!
This often happens when a property only has natural ventilation (such as trickle vents) but the building fabric performs better than expected. In these situations, the issue is not excessive leakage. Instead, the result may conflict with the assumptions made in the design or SAP assessment.
We recommend checking the target air permeability with your architect or SAP Assessor before the build progresses too far. This is especially important for very efficient homes, low-energy buildings and Passivhaus-style construction.
Complex Buildings Need Early Advice
Large, unusual or complex buildings often benefit from early advisory testing. Waiting until the final test can be risky, particularly if air leakage paths will be hidden behind plasterboard, finishes or fitted units.
We offer air tightness testing services from early advisory tests through to final certification. For Passivhaus builds or projects with ambitious airtightness targets, an interim test before plasterboard is installed can be very useful. It allows leaks to be identified and corrected while access is still possible.
Our team has experience with a wide range of buildings, from domestic properties to commercial premises and community buildings, including projects in remote areas and on Scotland’s west coast islands.
How Thermal Image UK Can Help
If your building fails an air tightness test, the next step is to find out why, and we’re here to help.
At Thermal Image UK, we are one of the few companies to combine air tightness testing with thermal imaging and smoke testing. This means we can help identify excessive air leakage, heat loss issues and problem areas within the fabric of the building.
We use calibrated Retrotec blower door fans, from small 300 series fans to powerful 6000 series fans, allowing us to test properties of many different sizes. We also use high-resolution thermal imaging equipment to provide a clear visual representation of heat loss and air leakage issues where conditions allow.
Our air tightness tests are carried out in line with the requirements of Section 6 of the Scottish Building Regulations Technical Handbook and Part L of the Building Regulations for England and Wales. We can also issue Air Permeability Certificates within 24 hours of the test.
Book Air Tightness Testing Services with Thermal Image UK
A failed air tightness test can delay certification, but it does not have to become a major problem. With the right preparation, many common failures can be avoided. And where problems do arise, quick diagnosis can make all the difference.
Thermal Image UK provides professional air tightness testing services across Scotland, the North of England and further afield. Whether you need an early advisory test, a final certification test or help finding the cause of a failed result, we can guide you through the process from start to finish.
For a quotation or further information, contact Thermal Image UK and we will be happy to help.